
10 Best Wall Backsplash Ideas for Kitchens?
A kitchen backsplash does more than fill the wall between counters and cabinets. It catches splashes, frames the work area, and can change how bright or warm a room feels. The best Wall Back Splash choice balances appearance with everyday cleanup. Think about where water lands, how close the cooking surface sits, and whether your household prefers quick wiping or occasional maintenance. Small details matter. Grout color, tile edges, and outlet placement can shape the finished look as much as the material itself.
This guide explores 10 kitchen backsplash ideas, from classic ceramic tile to stone, glass, and full-height designs. Each option brings different benefits and trade-offs. A glossy surface may brighten a dim kitchen, but fingerprints can show. Natural stone has distinctive veining, though some types need sealing and careful cleaning. Check product instructions for heat exposure, installation, and upkeep before choosing materials near a cooktop or sink. No single choice works for every kitchen. Measure your wall, collect samples, and view them in your own lighting. And honestly, the most dramatic sample may feel tiring once it covers a whole wall. A practical choice can still have character. These ideas will help you compare styles and find a backsplash that suits your space, routine, and budget.
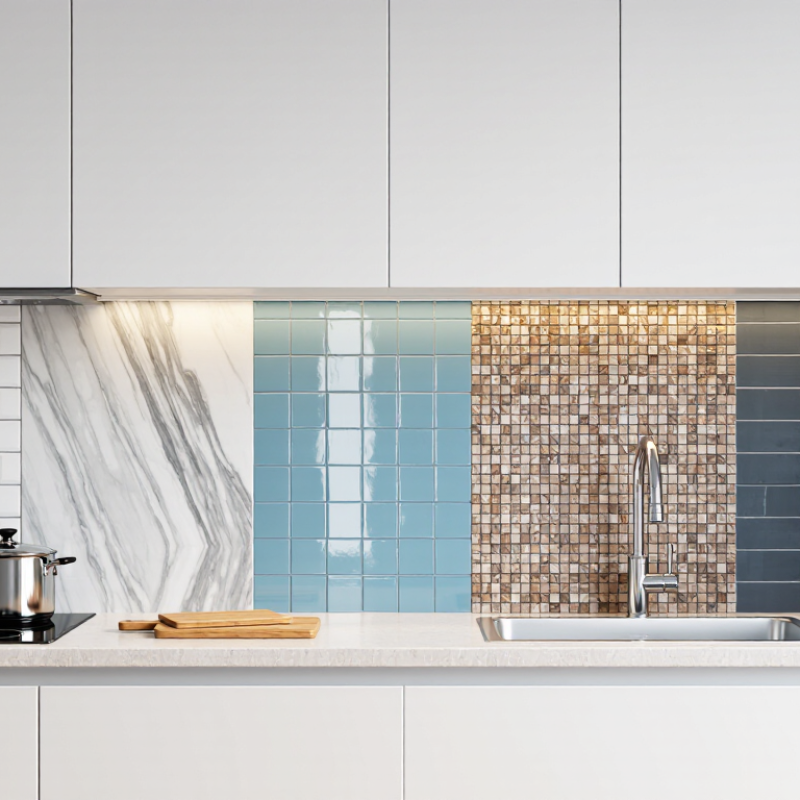
How Kitchen Wall Backsplashes Protect and Define the Space
A kitchen backsplash is more than a strip of color. It takes splashes from the sink, grease near the range, and daily wiping that can wear down painted drywall. The 2024 U.S. Kitchen Trends Study reported that 84% of renovating homeowners replaced their backsplash. That figure reflects how often homeowners treat this surface as part of a kitchen upgrade, not merely decoration. Tile with tight grout joints is practical, while a continuous slab creates fewer seams. Neither choice removes the need for careful installation.
Materials matter, but so does what sits behind them. ANSI defines porcelain tile as having water absorption of 0.5% or less, making it a durable surface choice. Still, tile and grout alone do not make a wall waterproof. A suitable substrate and properly sealed joints help protect vulnerable areas.
Visually, a backsplash can connect cabinets, counters, and flooring through color or texture. A pale, glossy tile can brighten a shaded corner; a dark grout line adds definition. It can also feel busy. That balance is easy to misjudge from a small sample.
Tips: Hold samples beside your countertop in morning and evening light. Choose a surface you can wipe easily, and ask an installer how the wall will be protected beneath it. Grout needs attention. Even a beautiful backsplash can disappoint if its joints stain or its edges collect grime.

What to Consider When Choosing a Kitchen Backsplash
A backsplash has to do more than look good in a sample. It sits beside steam, oil, and daily wiping, so choose a surface that suits how you cook. Smooth glazed tile is usually easier to clean than a deeply textured finish. Grout matters, too: pale grout may show tomato sauce or coffee sooner, while fewer grout joints can mean less scrubbing. Small details matter. Check the tile under your kitchen lighting; a warm color may look surprisingly yellow beneath cool bulbs.
Before choosing among wall backsplash ideas, measure the area and note outlets, window trim, and the gap behind the range. These interruptions affect tile cuts and can make a patterned layout feel busy. Compare samples beside your countertop and cabinets, rather than judging them separately. A bold backsplash may enliven plain cabinets, but it can compete with a veined counter. Looks can mislead. Include installation and upkeep in your budget, such as sealing stone or ordering spare tiles. Ask an installer how corners, edges, and transitions will be finished before buying. A small sample helps, but it cannot show how every grout line will look across a full wall.
10 Kitchen Wall Backsplash Ideas for Different Styles
A kitchen backsplash should suit the room’s style and the way it is used. Classic white subway tile keeps a small kitchen bright, while dark grout adds definition between each tile. For a softer look, handmade-style ceramic brings gentle color shifts and slightly uneven edges. That variation feels warm, though it can make a neat grid harder to achieve.
Natural stone creates a quieter, more continuous surface, especially when its veining echoes a countertop. It may need sealing, so check the care requirements before choosing it. For a modern kitchen, large-format porcelain reduces grout lines and gives the wall a cleaner appearance. Geometric tiles can add movement, but busy patterns may compete with open shelves or patterned floors. Keep nearby finishes simple.
Painted beadboard suits cottages and relaxed kitchens, but it needs a suitable finish near sinks and cooking areas. Stainless steel offers a practical, crisp look behind a range, though fingerprints show quickly. Small mosaic tiles work well as a narrow accent; across a full wall, their many grout joints can take more cleaning. No option is maintenance-free. A sample board helps: view it beside your cabinets in morning and evening light before committing. Sometimes the favorite tile looks different at home.
How Backsplash Materials Compare in Cost and Maintenance
Ceramic tile is often one of the more budget-friendly backsplash choices, and a cracked tile can usually be replaced without removing the whole wall. Grout needs regular attention, especially behind a cooktop where oil and tomato sauce can settle. Porcelain tends to cost more, but its low water absorption makes routine cleaning simple. Check local quotes; tile size and cutting needs affect labor.
Natural stone can raise both material and installation costs. Some stones need periodic sealing, and acidic splashes may dull certain finishes. That maintenance is easy to underestimate. Glass tile usually costs more than basic ceramic and may require careful installation to keep lines even. Its smooth surface wipes clean, though water spots and fingerprints can show near the sink.
Metal panels have few grout lines, so there is less grout to scrub, but scratches and smudges can be noticeable. Installed cost depends on wall preparation, layout, and how many outlets need trimming. A small sample beside your actual stove can reveal whether a glossy surface shows every streak. I once thought pale grout would stay pristine; it did not, and darker grout would have been the more practical choice.
10 Best Wall Backsplash Ideas for Kitchens? - How Backsplash Materials Compare in Cost and Maintenance
| Backsplash idea | Typical installed cost (USD/sq. ft.) | Maintenance | Durability and practical notes | Best suited to |
|---|---|---|---|---|
| 1. Ceramic subway tile | $15–$40 | Low; wipe tile regularly and clean grout as needed. Seal grout if the product requires it. | Water-resistant and easy to replace by section. Grout lines can collect grease and stains. | A versatile, budget-conscious kitchen update. |
| 2. Porcelain tile | $20–$50 | Low; clean with a mild household cleaner. Grout may need periodic sealing. | Dense, durable, and resistant to moisture and stains when properly installed. | Busy kitchens that need a hard-wearing surface. |
| 3. Glass tile | $25–$60 | Low; wipe with a non-abrasive cleaner to reduce streaks. Keep grout clean. | Nonporous tile resists moisture, but the surface can show fingerprints and water spots. | Adding light and reflective detail to smaller kitchens. |
| 4. Natural stone tile | $30–$80 | Moderate to high; many stones need periodic sealing and prompt cleanup of acidic spills. | Each piece has natural variation. Porous stones can absorb oils or stain if left unsealed. | A textured, natural look where regular care is acceptable. |
| 5. Marble tile | $40–$100 | High; seal as recommended, use a pH-neutral cleaner, and wipe acidic liquids quickly. | A natural stone that can etch from acids and stain from oils; finish and porosity affect care. | A distinctive, polished focal point for kitchens with careful upkeep. |
| 6. Stainless steel sheet or tile | $30–$70 | Low; wipe with a soft cloth and suitable cleaner. Avoid abrasive pads that can scratch the finish. | Nonporous and moisture-resistant; fingerprints, scratches, and dents may be visible. | A clean-lined look, especially near cooking areas. |
| 7. Engineered quartz slab | $50–$120 | Low; clean with mild soap and water. Sealing is generally not required. | Few seams create a smooth surface, but heat tolerance varies; follow the maker's care guidance. | A continuous surface coordinated with a countertop. |
| 8. Large-format porcelain slab | $50–$120 | Low; clean with a non-abrasive household cleaner. Minimal grout reduces routine scrubbing. | Low porosity and few joints; specialist handling and careful installation are important. | A seamless stone-inspired look with less grout maintenance. |
| 9. Painted or sealed brick | $20–$50 | Moderate; seal porous surfaces and clean gently. Textured grout and brick may trap grease. | Offers pronounced texture; a proper sealer helps protect against kitchen splashes. | Rustic or industrial interiors away from heavy splashing. |
| 10. Waterproof laminate panel | $10–$30 | Low; wipe clean and protect seams and edges from standing water. | Fast to install and available in many patterns; heat and moisture limits depend on the specific panel. | A quick, lower-cost refresh away from direct high heat. |
Cost ranges are broad U.S. estimates per square foot for materials and installation. Actual prices vary by location, surface preparation, layout, labor, and project size; confirm current local quotes before budgeting.
How to Plan and Install a Kitchen Wall Backsplash
Planning a kitchen wall backsplash begins with a measured sketch, not a tile sample. Record each wall’s width and height, then subtract large openings. Houzz’s 2024 U.S. Kitchen Trends Study reports that 84% of renovating homeowners upgraded their backsplash, making it a frequent part of kitchen projects. Choose a surface that suits your cooking habits, cleaning routine, and lighting. Glossy tile can brighten a dim corner, but it may show splashes more clearly.
Check that the wall is sound, clean, dry, and reasonably flat before setting tile. Mark a level starting line, then dry-fit rows around outlets and corners. This reveals awkward cuts early. Turn off power before removing outlet covers, and use suitable extensions if the finished tile changes outlet depth. Follow the mortar and grout instructions for coverage and curing time. The details can feel fussy. Skipping them can leave uneven joints or loose tiles.
Tips: Order roughly 10% extra tile for cuts and breakage; intricate layouts may need more. Keep a few spare tiles for future repairs. Seal only when the tile or grout instructions call for it. One easy-to-miss detail is the bottom edge: plan a clean finish where tile meets the counter, and use a flexible sealant at movement joints rather than grout.

