Why Choose Sliding Roller for Your DIY Projects?
Choosing the right tools for DIY projects can be daunting. Among these, the sliding roller stands out as a versatile choice. Expert in home improvement, John Stevens, says, "A sliding roller can transform your project with ease and efficiency." This insight highlights the simple yet effective nature of the tool.
Many DIY enthusiasts overlook the sliding roller. They might stick with traditional methods, missing out on unique advantages. For instance, this tool helps achieve smoother movement and better alignment. Picture a heavy door gliding effortlessly on its track. This can save time and reduce frustration. Yet, not everyone recognizes its potential.
However, every project has its challenges. Using a sliding roller requires some understanding. Proper installation and alignment are crucial. If not done right, it can lead to setbacks. Reflecting on these details can make a significant difference in the final result. Exploring the benefits of the sliding roller could be a game-changer for your next DIY venture.
Benefits of Using Sliding Rollers in DIY Projects
When embarking on a DIY project, incorporating sliding rollers can provide significant benefits. These rollers enhance mobility, making it easier to maneuver heavy items. They can be installed on doors, shelves, or even furniture. Imagine sliding a heavy door with just a fingertip. It's effortless and efficient.
Another advantage is accessibility. Sliding rollers can simplify your workspace by reducing clutter and enabling better organization. Instead of lifting items, you can slide them seamlessly. This aspect is particularly helpful in tight spaces. A small kitchen can feel less cramped when items can glide out of sight.
However, installation might not always go smoothly. You may need to troubleshoot alignment issues.
Adjusting the rollers can be tricky. It's essential to ensure they are at the right height. A misalignment could lead to future frustrations. Additionally, consider the weight capacity. Overloading can wear them down faster than expected. Reflecting on these details can elevate your DIY projects.
Types of Sliding Rollers Suitable for Various Projects
Choosing the right sliding roller can significantly enhance your DIY projects. There are various types of sliding rollers available, each designed for specific applications. Understanding these types can help you make informed decisions.
Heavy-duty sliding rollers are perfect for large items. They can support heavy loads with ease, making them ideal for moving furniture or machinery. In contrast, lightweight sliding rollers are suitable for smaller projects. They work well for cabinets or drawers, ensuring smooth operation without causing damage. For outdoor use, consider weather-resistant rollers. They can withstand the elements, providing longevity.
**Tip:** Always check the weight capacity before purchasing sliding rollers. This is crucial for safety and performance.
Another category is the adjustable sliding roller. This type can accommodate various sizes and heights. However, installation can be tricky. Ensure you follow the instructions carefully; misalignment can lead to frustration.
**Tip:** Test the movement of your sliding rollers before finalizing the installation. This can help prevent future issues.
Reflect on your specific needs. Each project has unique requirements, and not all rollers fit every purpose. Selecting the wrong type may result in underperformance or compromise. Take time to assess what works best for you.
How to Install Sliding Rollers: Step-by-Step Guide
Sliding rollers are a practical solution for various DIY projects. They can enhance functionality and aesthetics. Tracking systems using rollers are becoming increasingly popular in homes. According to industry reports, the market for sliding systems is projected to grow by 8% annually over the next five years. This trend highlights their rising importance.
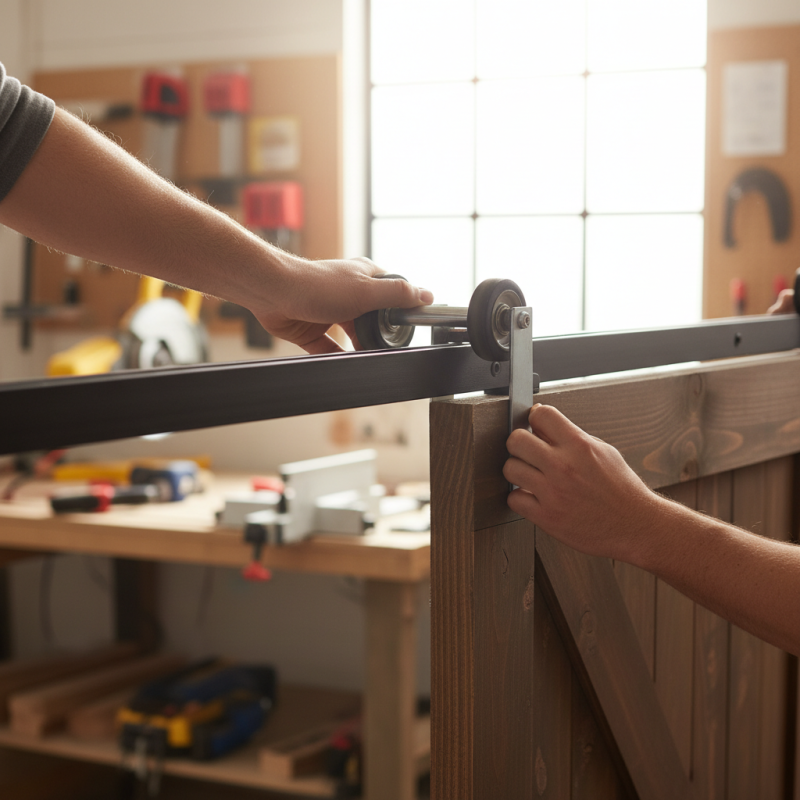
To install sliding rollers, start by measuring the space. Accurate dimensions are crucial. Mark the location where the rollers will go. Drill holes carefully; ensure they are aligned. This step can be tricky. Misalignment often leads to unnecessary issues later. After fixing the rollers in place, attach the sliding door or panel. Test the movement; it should be smooth. If it’s not, adjustments may be needed.
Consider using high-quality materials. This choice can significantly impact the function and look. However, not every DIYer knows where to find the best materials. It’s a common oversights, but it’s necessary to reflect on this point. With the right approach, sliding rollers can transform spaces effectively. The installation process might seem simple, but small mistakes can lead to frustration. Therefore, attention to detail is essential.
Benefits of Using Sliding Rollers for DIY Projects
Common Applications of Sliding Rollers in Home Improvement
Sliding rollers are becoming essential in home improvement projects. Their versatility allows for numerous applications. They can be used in sliding doors, cabinets, and even furniture. According to a report by the Home Improvement Research Institute, sliding hardware sales have increased by 23% over the past three years. This growth indicates a rising interest in DIY solutions that enhance both functionality and aesthetics.
One common application of sliding rollers is in pocket doors. These doors save space and add a modern touch to any room. With fewer components than traditional swinging doors, they require less room to operate. However, proper installation is critical. Misalignment can lead to frustrating issues, like doors that stick or cannot close fully. The American National Standards Institute suggests that proper alignment can improve door function by up to 30%.
Sliding rollers are also popular in cabinetry. They provide smooth access to storage spaces. While they are great for maximizing usability, not all rollers are created equal. Inexpensive options might wear out faster, leading to maintenance headaches. Selecting durable materials is essential for longevity. Awareness of these challenges can lead to better project outcomes, ensuring your efforts yield satisfying results.
Maintenance Tips for Prolonging the Life of Sliding Rollers
When working on DIY projects, sliding rollers offer convenience and efficiency. To ensure they remain functional, regular maintenance is essential. Start by cleaning the rollers and tracks regularly. Dust and debris buildup can hinder their movement. Use a damp cloth and a mild detergent to wipe them down. Avoid harsh chemicals that can damage the materials.
Lubrication is another key aspect. A silicone-based lubricant can help reduce friction. Apply it sparingly to the moving parts. Too much lubricant can attract dirt and grime, leading to more problems. Inspect the rollers for wear and tear. If they show signs of damage, replacing them early can save you from bigger issues down the road.
Temperature fluctuations can affect the performance of sliding rollers. Ensure that your DIY space maintains a stable temperature. Extreme heat or cold can warp the materials. Lastly, keep the rollers well-aligned. Misalignment can cause unnecessary wear. Regular checks can go a long way in extending their lifespan.